❮
![zoom]() ❯
❯
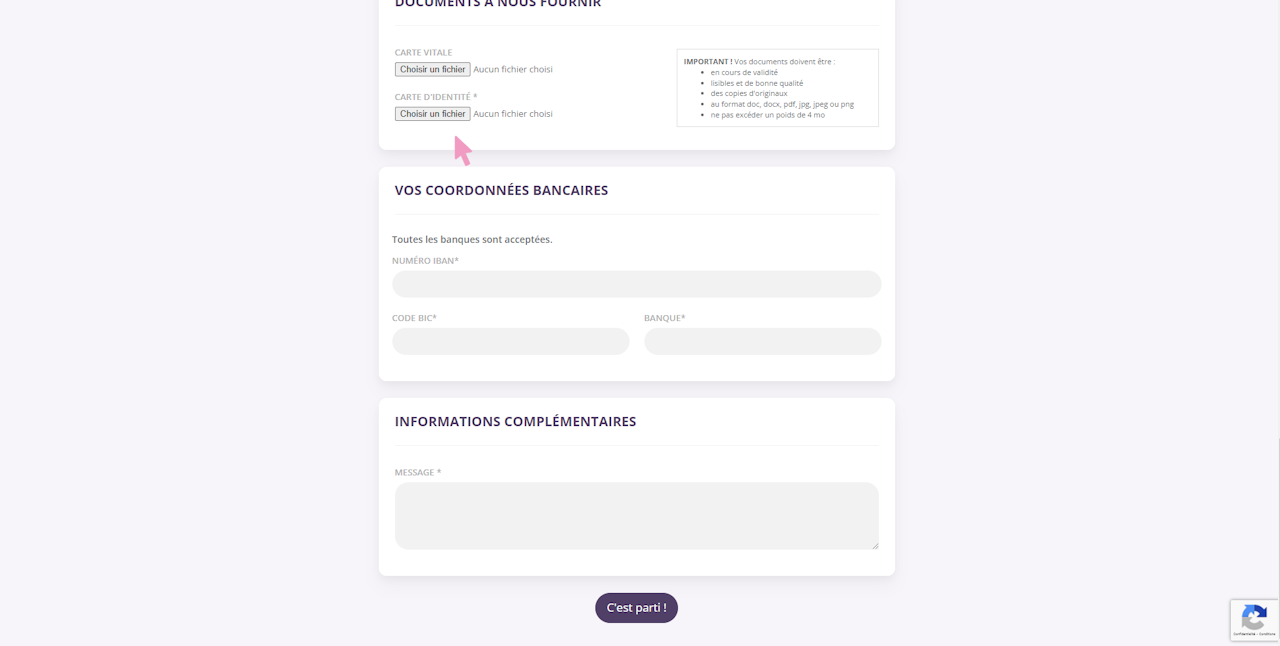
After entering the URL of the recruitment form in his search bar, the candidate arrives on the form page.
Depending on the settings, the candidate will be able to :
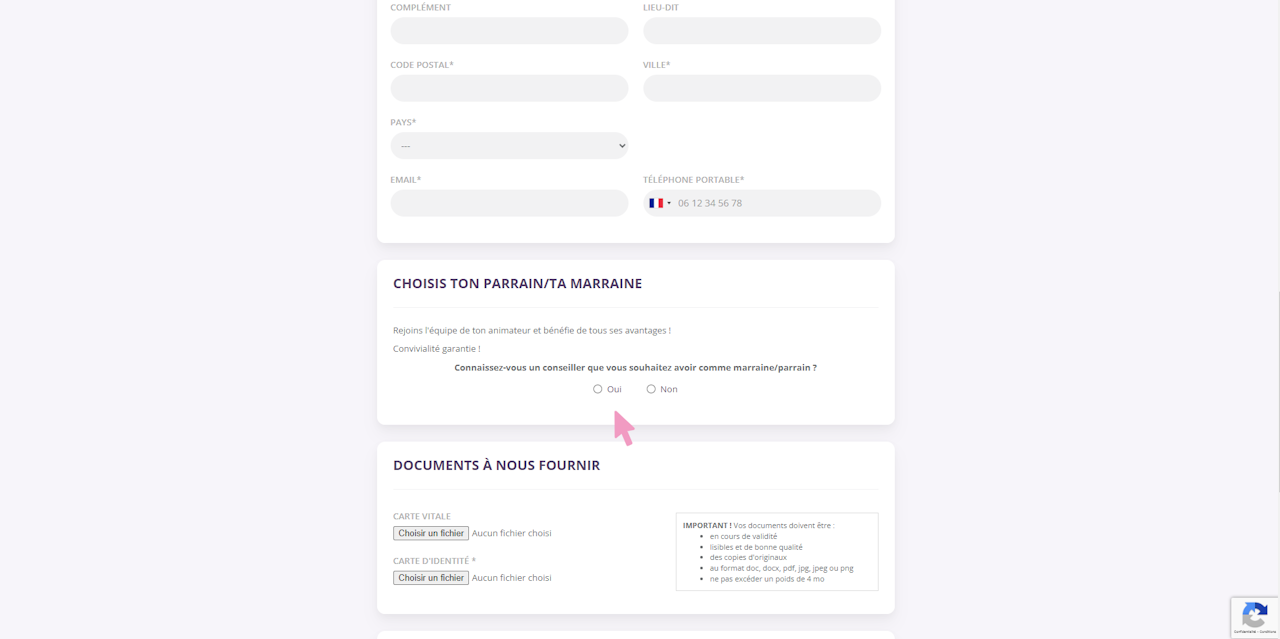
Attach your documents
Include bank details for commission transfers
Complete additional fields
In " Forms " then " Recruitment ", you'll find all requests with the various associated statuses.
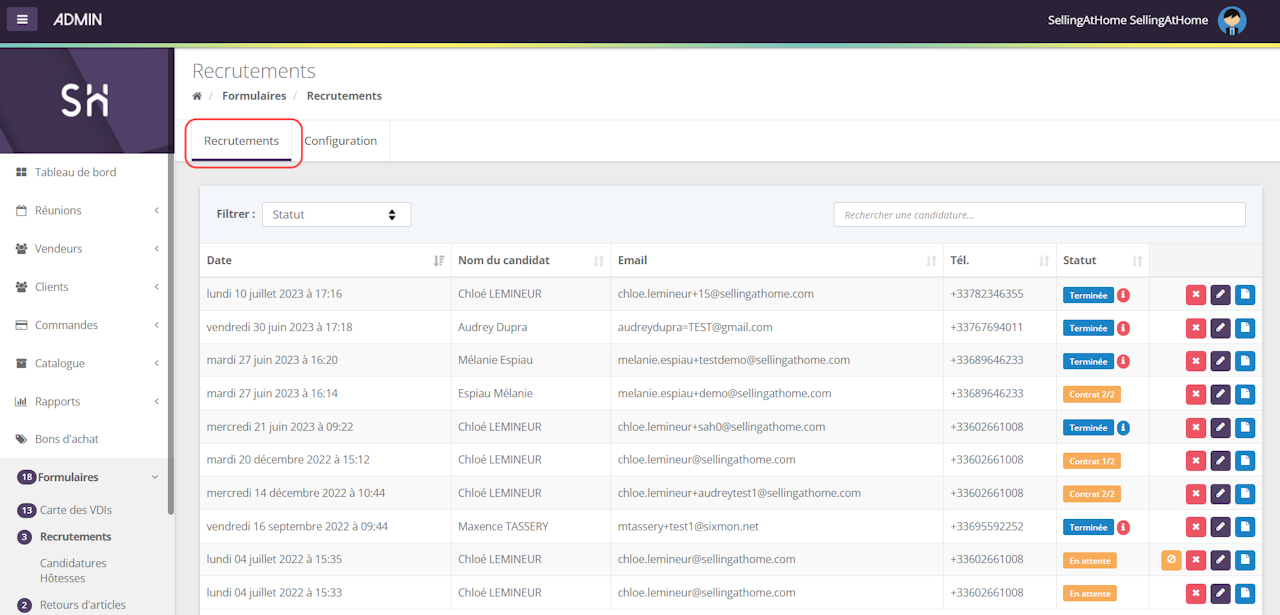
You will then need to click on "Edit" then select the applicant's documents to validate his or her file.
You will also receive an email for each new application.
Check attachments:
If you have unchecked "Group form and applications to be downloaded", the applicant will receive an e-mail to submit his/her documents.
Once the candidate has submitted his/her documents, you'll need to go to the application details (Status: to be validated). You can then view the documents, validate or reject them using the "Action for selection" button.
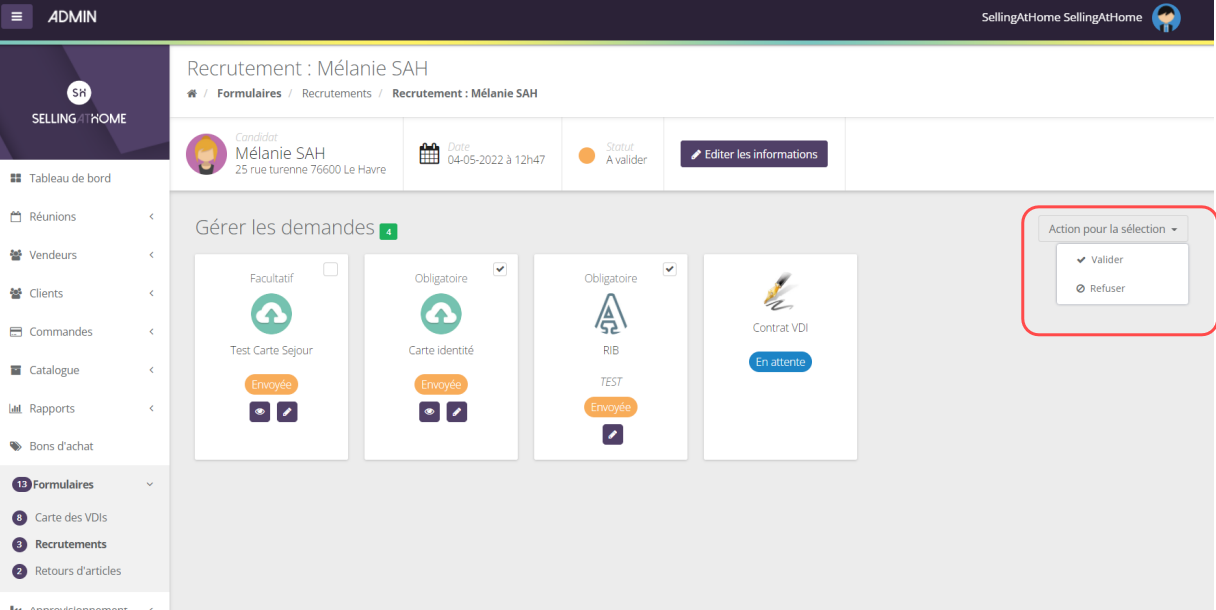
If you have checked the box "Automatic validation of requests" in the general configuration, then the documents will be automatically validated and the contract will be automatically sent for signature.
In the event of a document refusal, you are asked to attach a reason for the refusal. The candidate then receives an email to attach a new document. The status of the application changes back to "pending".
Explanatory diagram :
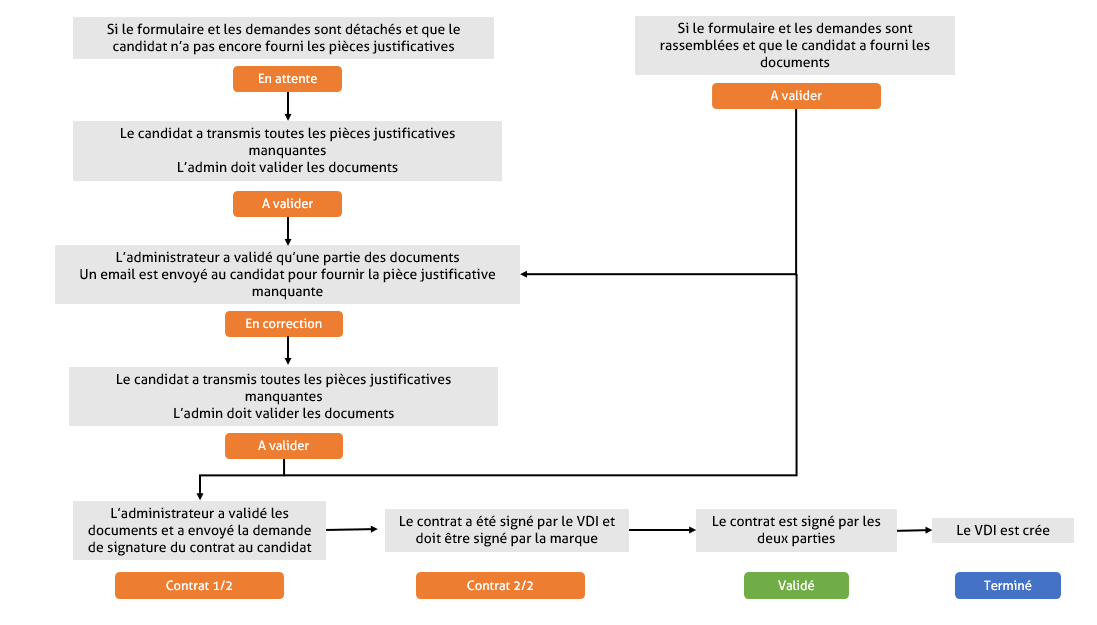
Once you've validated all the requested documents, don't forget to click on the "Send signature request" tab, so that the customer can sign the contract. The customer then receives an e-mail informing him of this.

Once the contract has been sent for signature, any changes made to the application will not be taken into account!
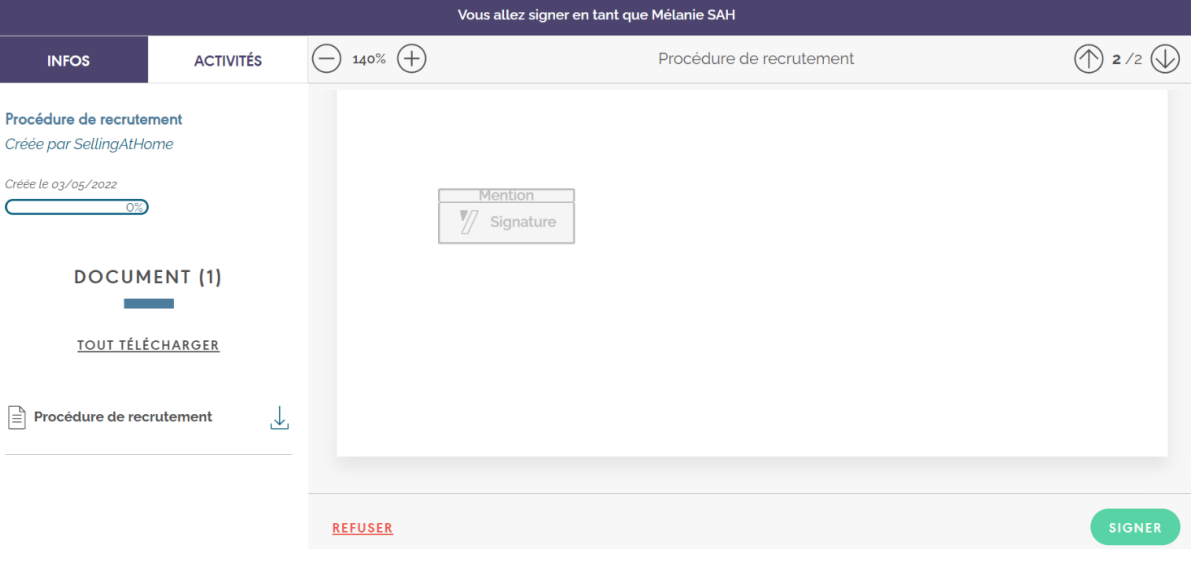
After clicking on " Sign contract ", the candidate is redirected to YouSign to sign the contract.
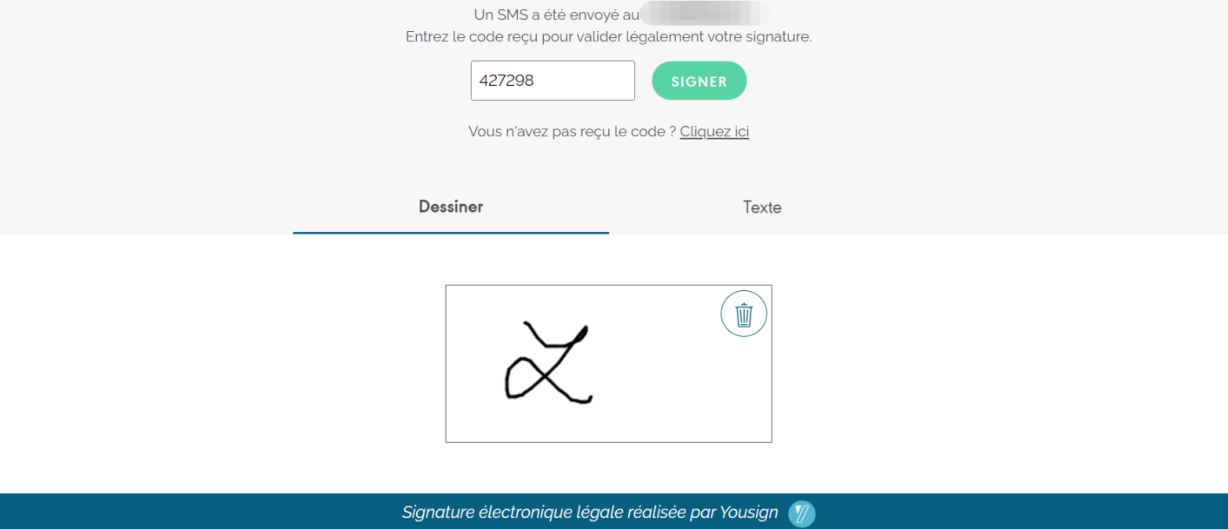
A code is then sent to him by SMS, he must draw or write a text then click on " SIGN " in green next to the code.
Once the candidate has signed the contract, the brand must also sign it, following the same process. An e-mail is then sent with a redirection to YouSign.
Once the contract has been signed by both parties, the VDI is automatically created. He or she then receives an e-mail to access the extranet and choose a password.
Once the contract has been signed, it is stored on the candidate's recruitment file.
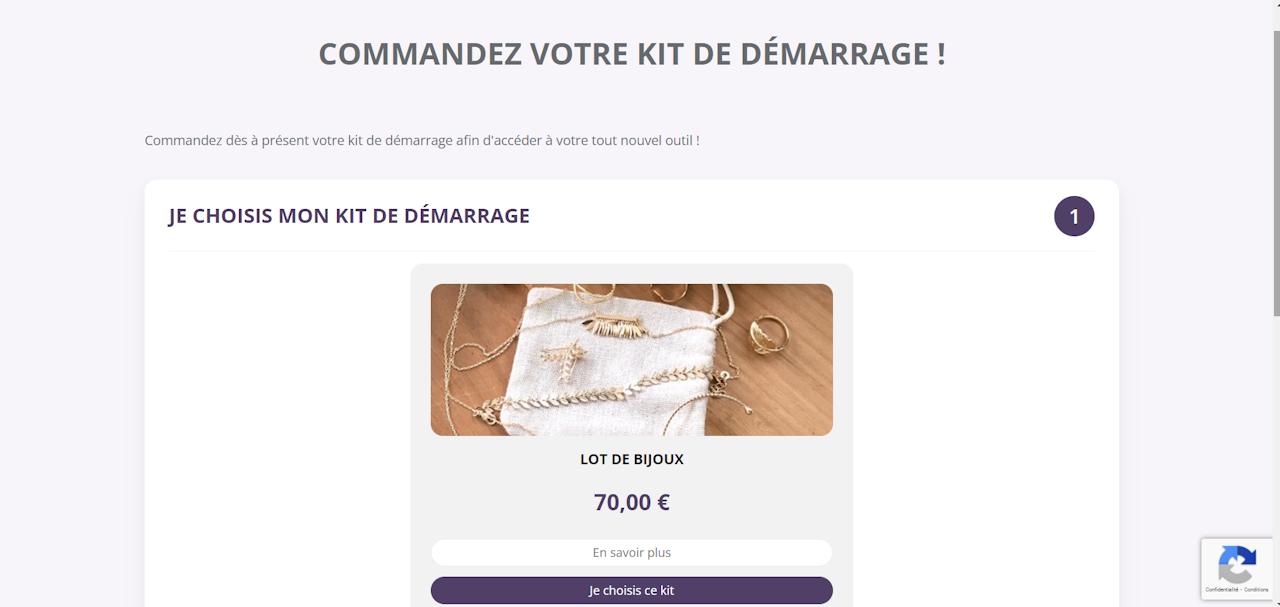
Once the contract has been signed, the seller receives a confirmation email with the contract attached, as well as an email to purchase the starter kit.
All recruitment module email templates can be customized in Parameters > Templates emails > Recruitments.
Delivery methods and costs in the kit purchase tunnel can be configured by the administrator in the delivery parameters. A filter on the order type "Starter Kit" allows you to customize charges.
Once the kit has been purchased, the seller receives a first login email to generate his password and access his extranet.
If you have ticked the box "Show account login button after kit payment", the seller is redirected to the password choice directly after kit purchase.
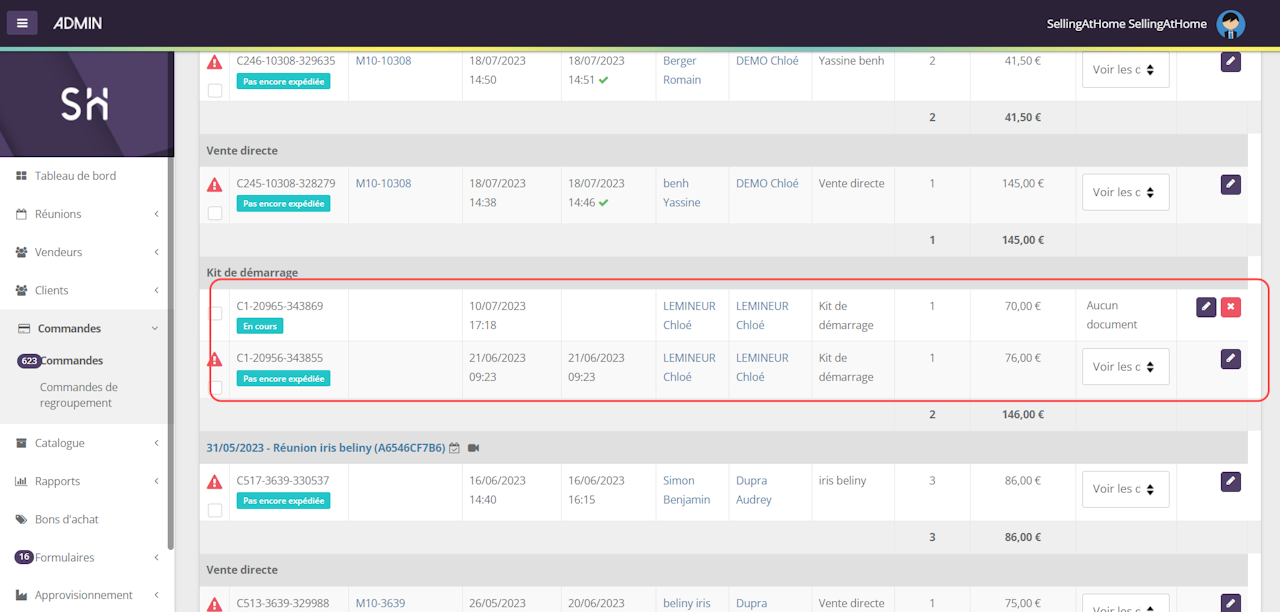
On the admin side, an order typed "Starter Kit" is created and ready to ship.
![]()
