❮
![zoom]() ❯
❯
To set up your recruitment process, go to " Forms " then to " Recruitment " and finally in " Configuration ". This is where you can configure your entire recruitment process.
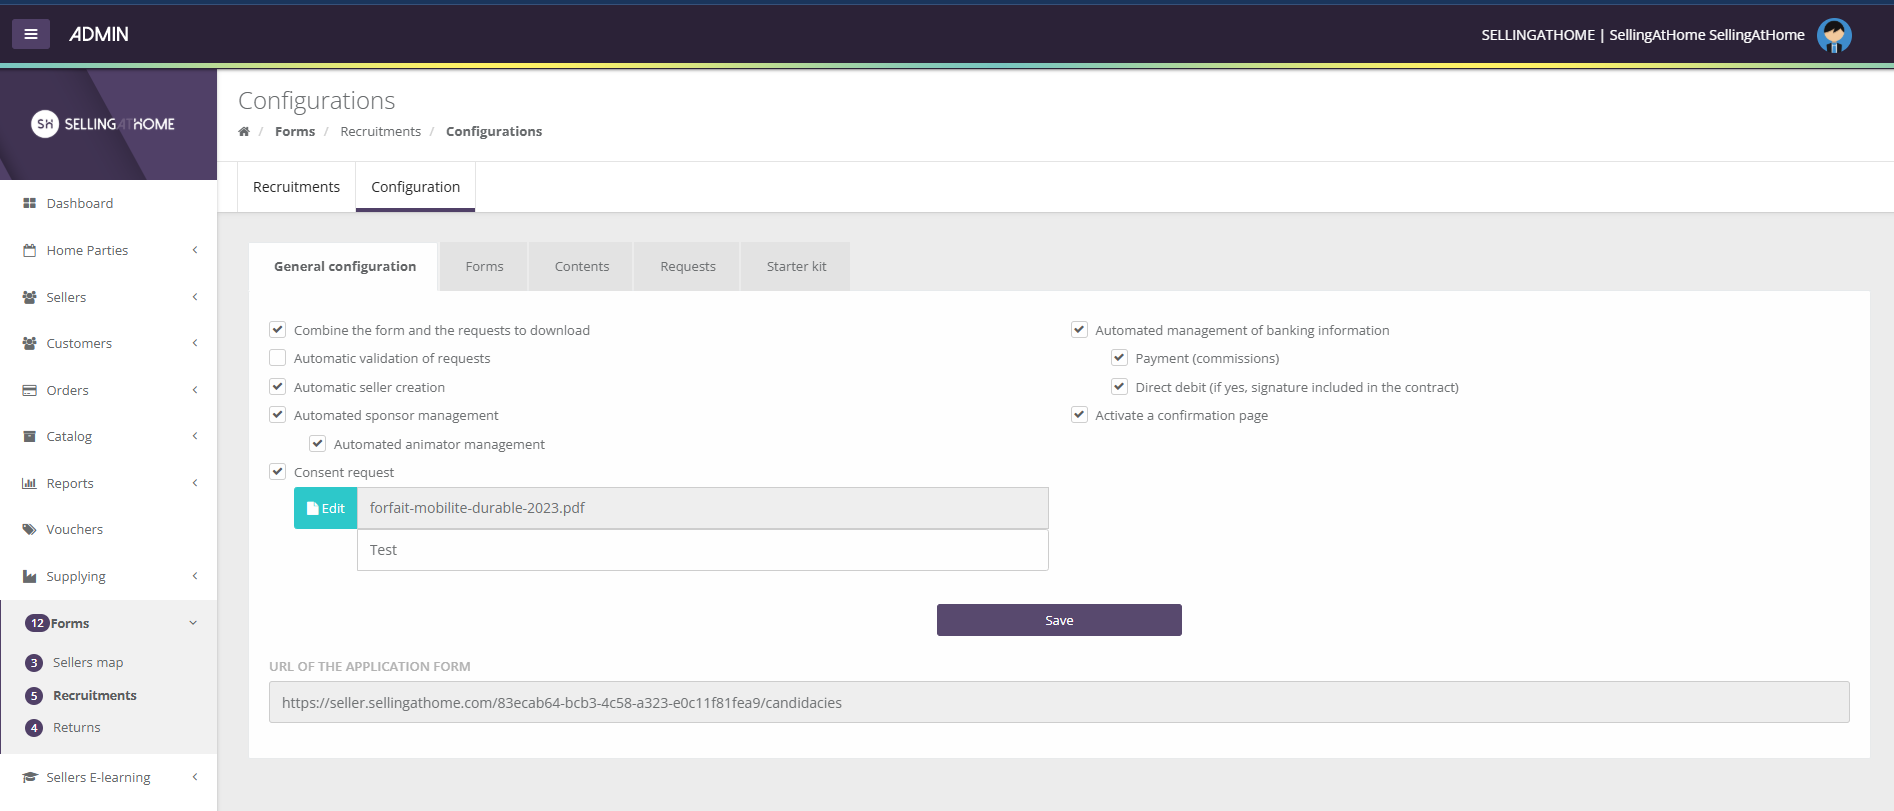
In this tab, you can check or uncheck the various options available to you for your form:
Group the form and requests for download. If this option is unchecked, you need to validate that the documents have been sent from the ADMINISTRATOR side, so that an e-mail can be sent to the applicant to attach the documents.
Automatic validation of requests - Automatic seller creation. The seller is created once the contract has been signed by both parties. ADMIN must still manually unlock the seller's access.
Automated sponsor management. The sponsor's attachment is automatic when the VDI is created.
Automated management of banking information - Payment (commissions) - Direct debit (If yes, signature included in contract)
Activate confirmation page
Don't forget to save when you change your settings. You'll find the URL of the form specific to your brand. This link is the same for all sellers. This link allows you to integrate the form into your website.
This tab contains all the fields for your forms. You can drag and drop fields and make them mandatory or additional according to your needs.
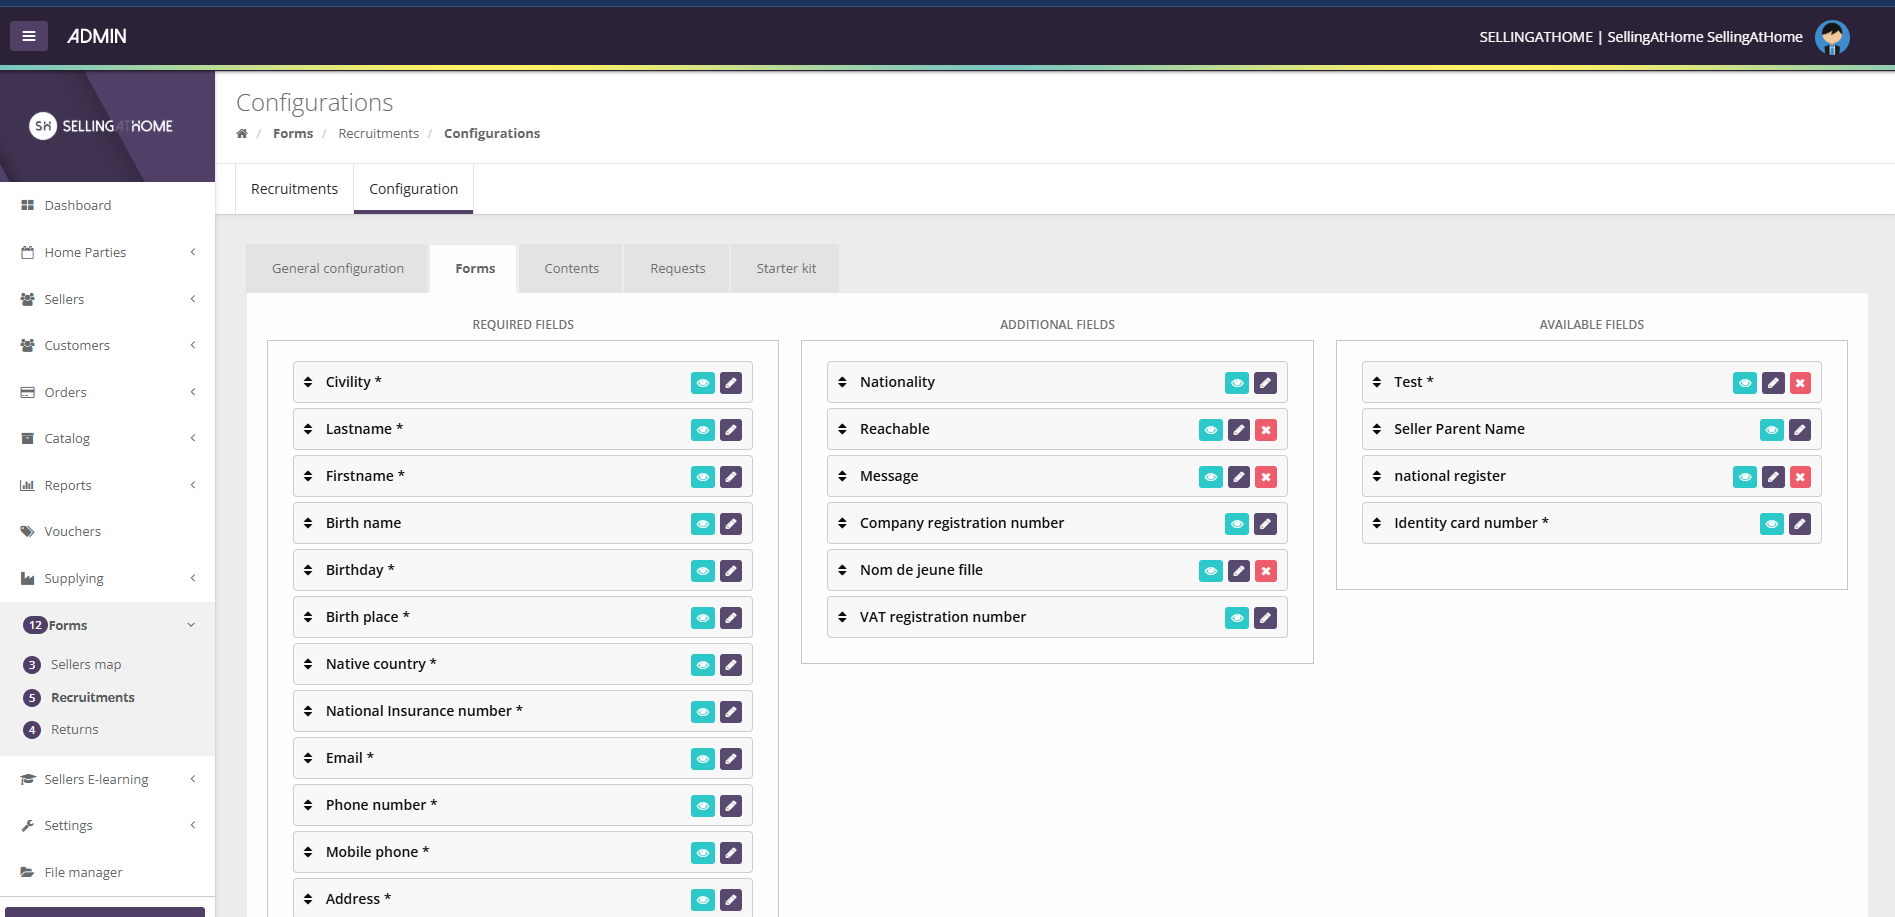
You can add fields and view your form.
To add a new field, simply click on the insert "Add a field" and fill in the information. Then " save " to make your new field appear in the window.

The system name is the basic name and the field label is the name of the field that appears in the form.
In order to customize your form, you need to go to the " Contents" tab. You can give the form any title you like. You can also add a description and a visual, which can be modified at any time.
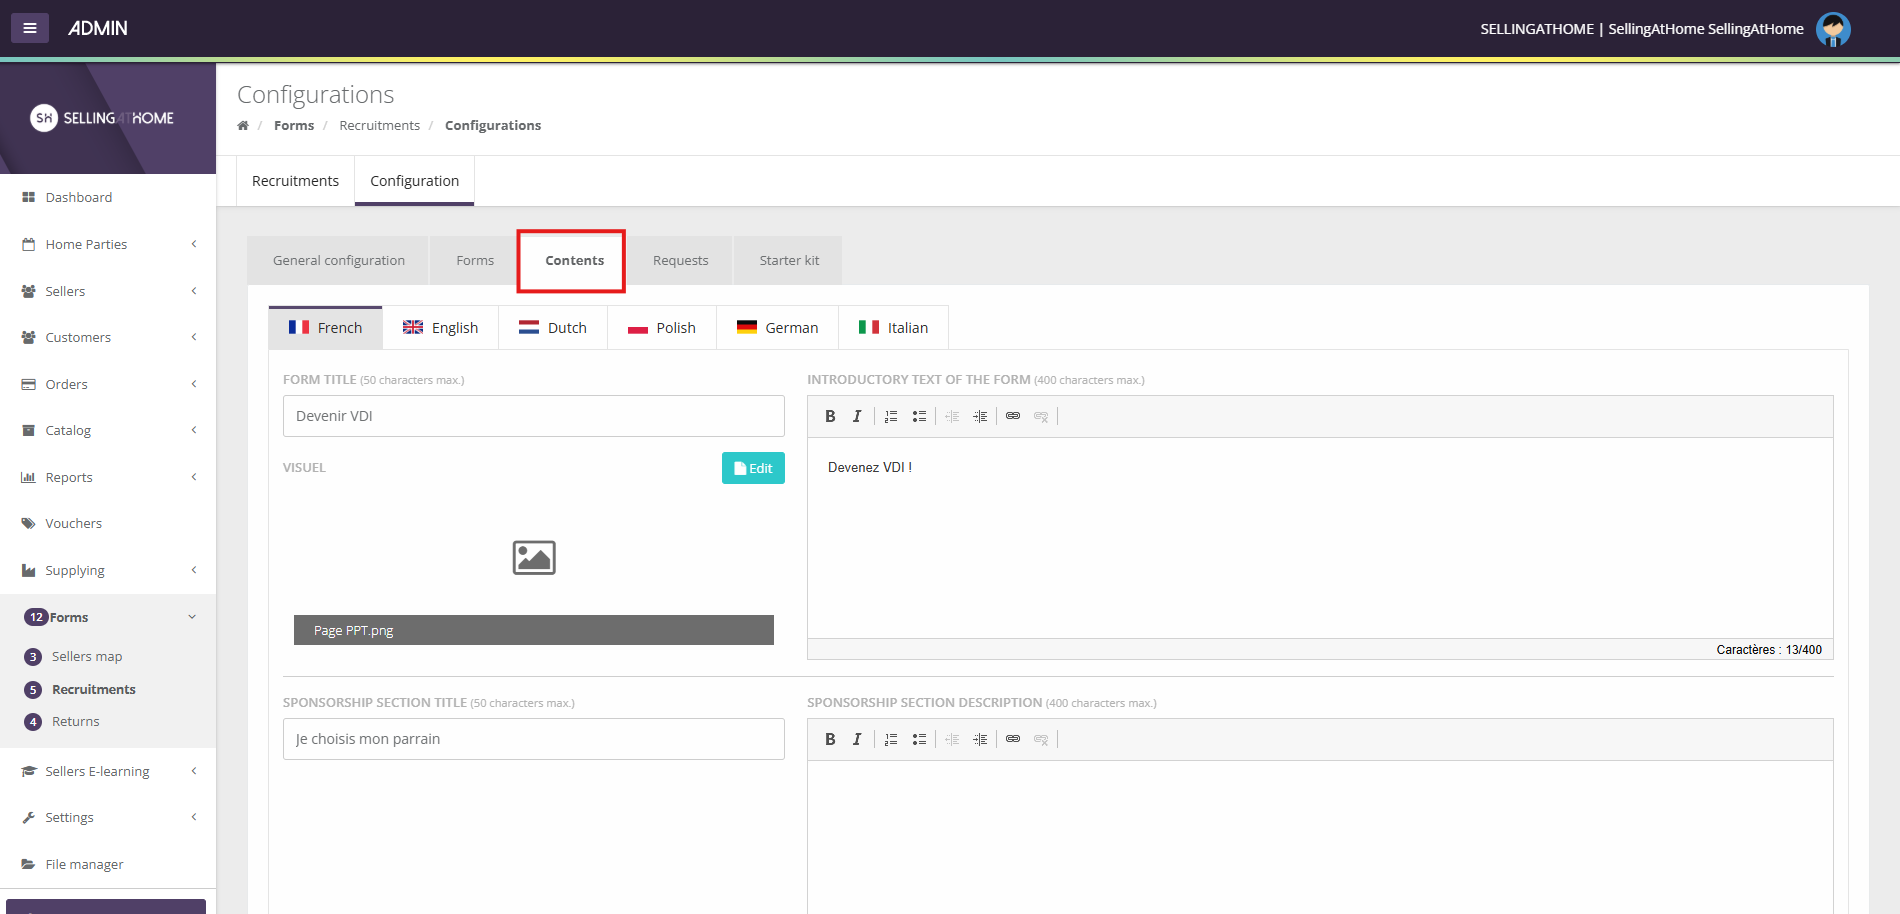
You can give your sponsorship section a title, a description and customize the text of your validation button.
If you wish to add a confirmation page, you can customize the title, description and link to which the candidate is redirected after clicking on the validation button. Finally, you can preview your form.
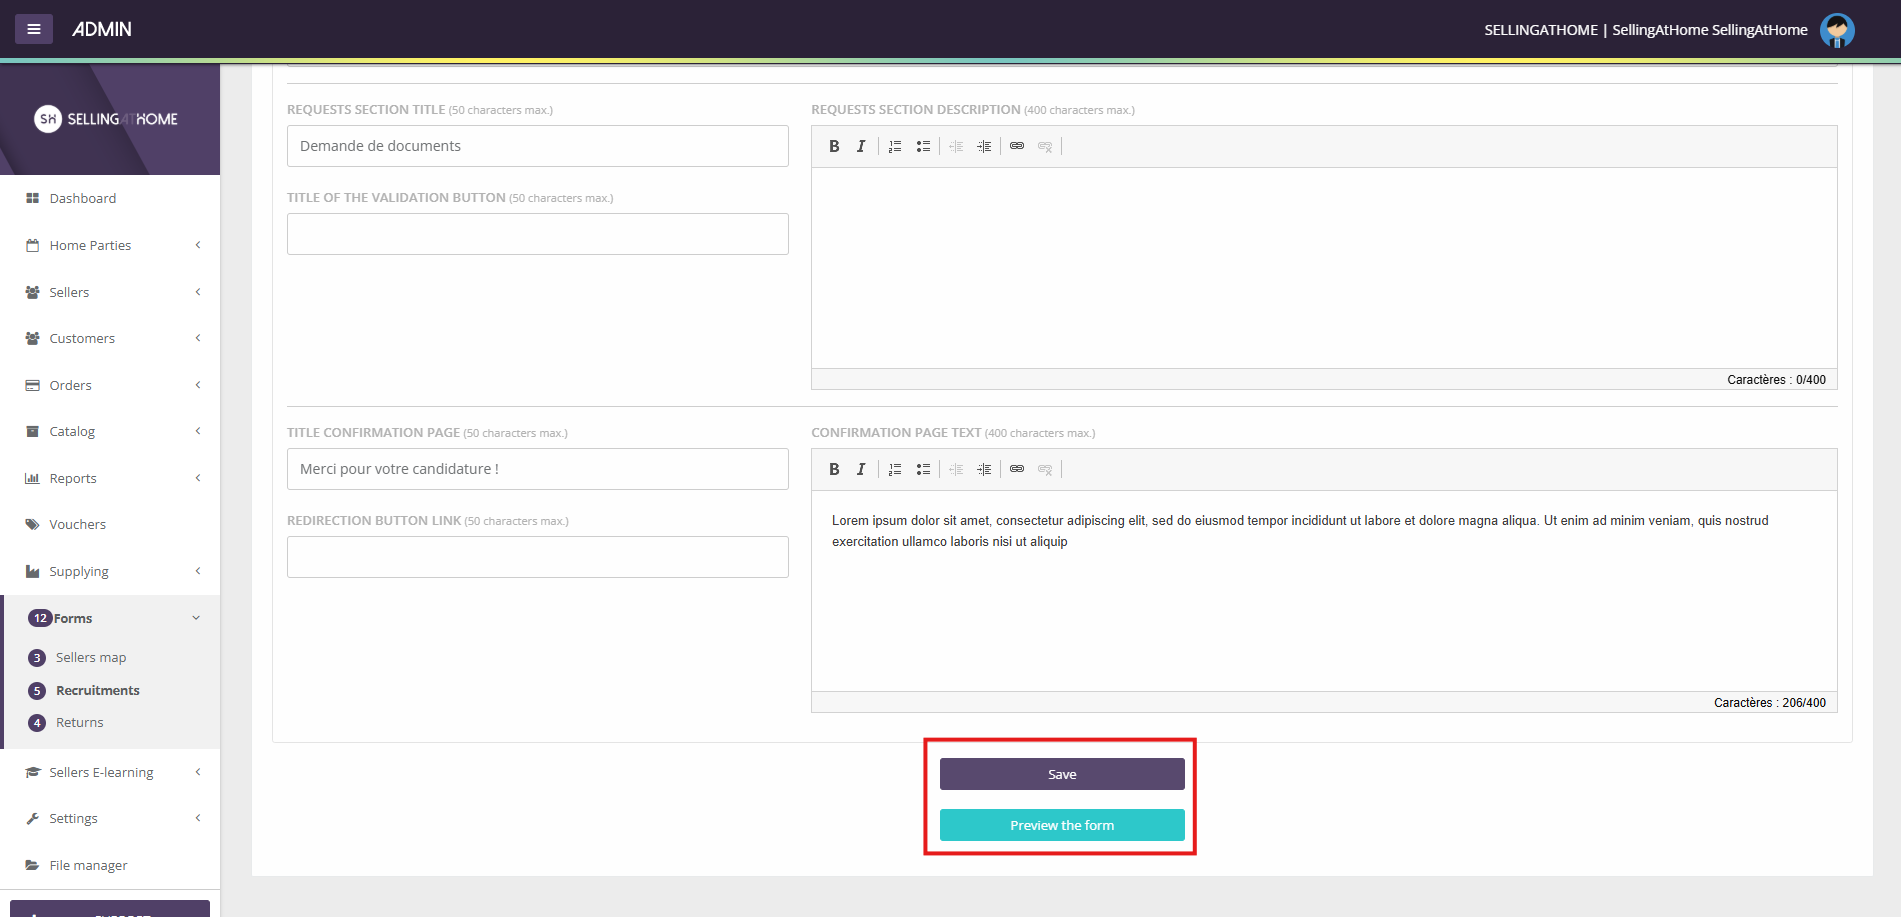
Don't forget to save each time you make changes.
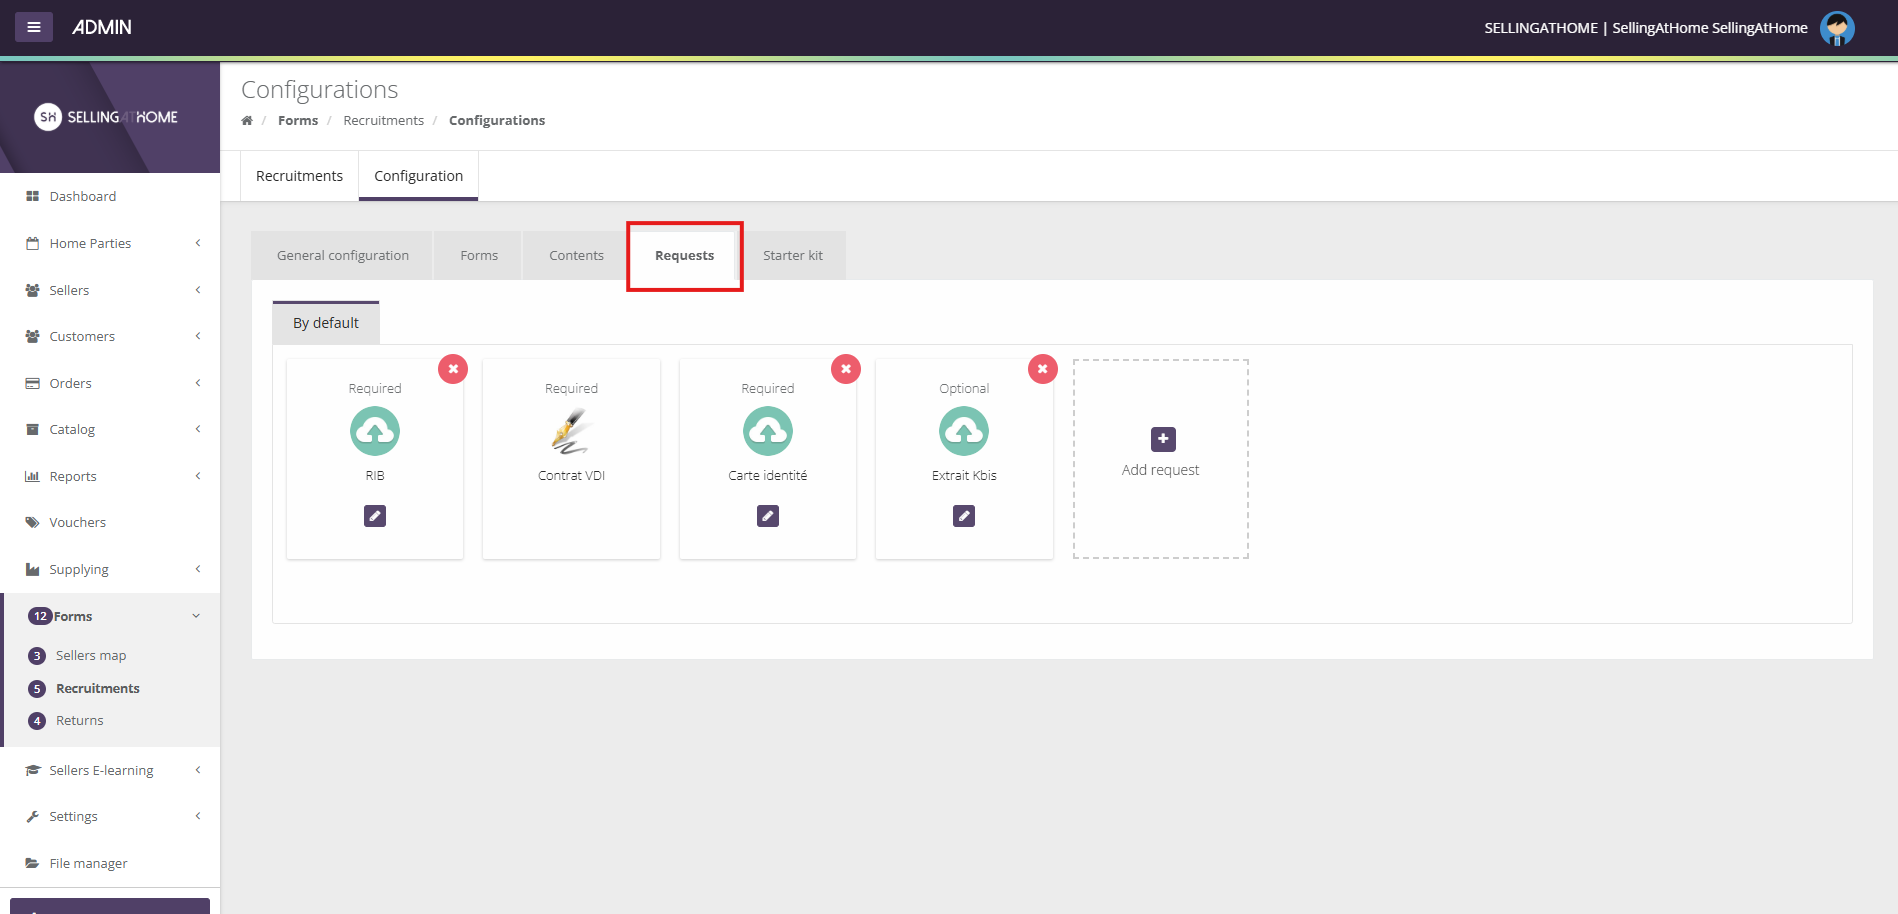
Whether it's directly in the form or the documents are submitted afterwards, it's in this tab that you indicate the documents you wish to receive from the VDI for the validation of his application (for example: identity card, carte vitale...).
These requests may be for documents or text, or both. A request may be mandatory or optional.
![]()
 Example of recruitment